
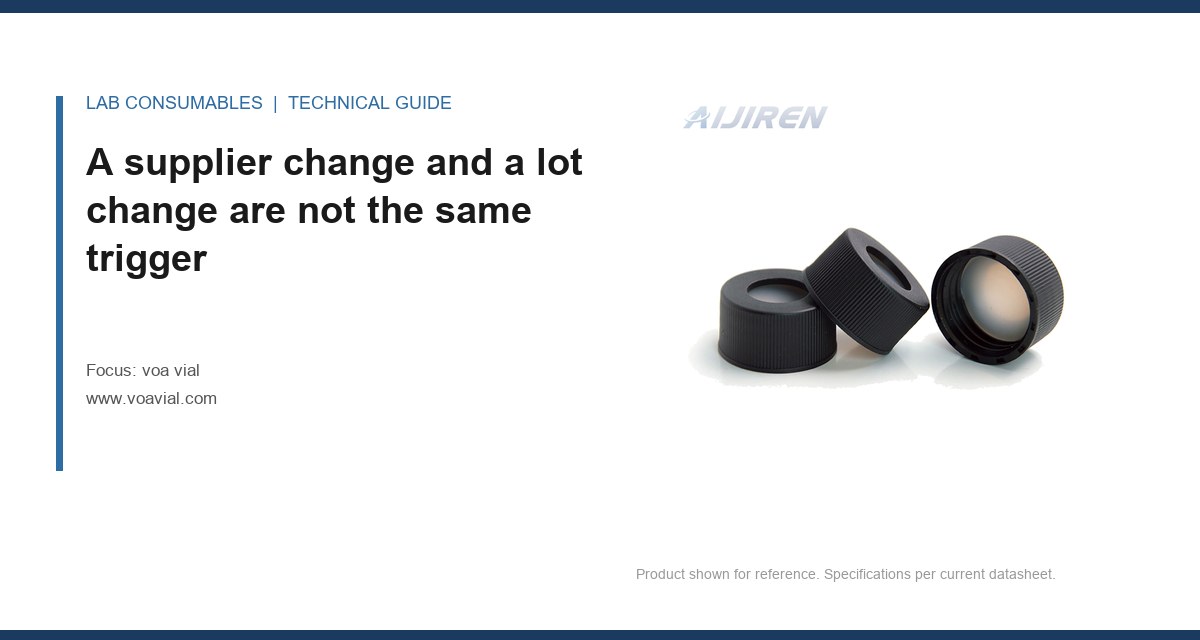
Lot 22-K-0417 came in with a certificate that matched the prior lot on every line: 9 mm screw thread, 12 x 32 mm body, 1.5 mL fill, PTFE-faced silicone septa, GPI 9-425 closure. The system suitability run on Monday morning failed at 2.8% RSD on the early-eluting internal standard, against a limit of 2.0%. Nothing else had changed. The column was the same lot, the mobile phase was fresh, the autosampler was the same. The revalidation trigger was a voa vial supplier change that the change-control record had classified as “equivalent, no action required.” That classification was wrong, and the run proved it. This is the article about how to get that classification right, and how to write the change-control entry so a reviewer or inspector reads it and moves on.
Most labs treat “new supplier” and “new lot from the same supplier” as if they sit on the same axis. They do not. They sit on different axes, and they pull different revalidation obligations. I have watched more revalidation arguments fail because the change was filed under the wrong axis than for any other reason.
A supplier change is a change of manufacturer, of the glass plant that drew the vial, or of the septa converter. It is a change of the entire control system behind the part: the raw glass batching, the forming tolerances, the annealing profile, the washing and depyrogenation line, the septa cure schedule, the lot-release sampling plan. When you move suppliers, you are not buying a new part. You are buying a new process, and you have to demonstrate that the new process produces a part that behaves the same in your method.
A lot change within a supplier is a change of output from a process you have already qualified. It is a smaller event, but it is not a nothing event. The lot-to-lot drift that bites you is usually in one of four places: septa cure (which drives bleed and ghost peaks), glass inner-surface chemistry (which drives adsorption of polar analytes), dimensional tolerance on the body OD and the crimp dimension (which drives autosampler jams and needle coring), and closure torque on the crimp (which drives leak rate under headspace pressure). None of these are visible on the certificate unless you asked for them.
The revalidation trigger when a voa vial supplier or lot changes is therefore not a single event. It is a matrix of change type against method criticality, and the change-control entry has to show that you walked the matrix.
What the four change classes actually require
I use four classes. They map cleanly onto what an auditor will ask for, and they stop the argument about whether a given change is “major” or “minor” because the class is defined by the change, not by opinion.
| Change class | What changed | Minimum action | Acceptance evidence |
|---|---|---|---|
| Class 1 | Same supplier, same part number, new lot, certificate within spec | Verification: one system suitability run plus one injection of a known spiked sample | RSD within method limit; recovery within 90 to 110% of prior lot |
| Class 2 | Same supplier, new lot, certificate shows a shift in a critical attribute (septa durometer, glass OD, closure torque) | Partial revalidation: system suitability plus a 10-injection carryover and ghost-peak check on a blank | No peak > 0.5% of the analyte area in the blank; carryover < 1.0% |
| Class 3 | New supplier, same nominal part, or new manufacturing site from the same supplier | Full revalidation of the vial-dependent portion of the method: precision, accuracy, LOD/LOQ, carryover, and stability | All acceptance criteria met on the new part; old and new lots compared side by side |
| Class 4 | Change of part design (different septa material, different liner, different closure) | Full method revalidation, treated as a method change under your quality system | Full validation package, plus a documented rationale for the design change |
The line that matters is between Class 2 and Class 3. A lot change with a certificate shift is not a supplier change, but it is not a routine lot either. It is the class where most labs under-react, and it is the class where the 2.8% RSD in the opening scene came from.
The certificate is a release document, not a change notice
Here is the operational problem. The certificate of analysis tells you the lot met the supplier’s release criteria. It does not tell you whether the lot met your release criteria, because you probably never wrote any down. If you have not defined the vial attributes that matter to your method, you have no basis for deciding whether a certificate shift is a Class 1 or a Class 2 event. You cannot classify a change against a spec you do not have.
The attributes I insist on in the release criteria for a VOA vial, in rough order of how often they cause trouble:
- Septa durometer, shore A, typically 45 to 55 for a PTFE-faced silicone. A shift of 5 points changes needle penetration force and reseal behavior. If it goes soft, you get coring and septum fragments in the needle.
- Septa thickness, typically 1.0 mm or 1.3 mm. Thickness drives the crimp compression and the leak path under headspace pressure.
- Body OD, typically 22.5 to 22.75 mm for a 12 x 32 mm vial. This is the dimension that jams the autosampler tray, not the height.
- Inner surface chemistry, expressed as a silanol activity or a hydrolytic resistance class. This is the one that causes adsorption of polar analytes and the low-recovery failure mode.
- Closure torque on a crimped vial, typically 8 to 12 inch-ounces for a 9 mm aluminum crimp. Under-torqued closures leak; over-torqued closures crack the septa and core the needle.
- Residual extractables, expressed as a total ion count on a blank injection at your method’s sensitivity.
If your supplier cannot give you these numbers per lot, that is itself a Class 3 trigger, because you are buying an uncharacterized part. Ask for the release criteria before you ask for the certificate. The voa vial specification sheet should carry these attributes, and a supplier who will not put them on the sheet is telling you something.
Verification versus revalidation: the test that separates them
The practical question a lab manager asks is: do I run the full validation again, or can I get away with a verification? The answer is not a matter of taste. It is a matter of whether the change can plausibly move a validation parameter.
A verification confirms that the new lot still meets the method’s existing acceptance criteria on a reduced set of runs. It is appropriate when the change is within the qualified process envelope and the certificate shows no shift in a critical attribute. A verification run is typically system suitability plus one spiked sample at the mid-point of the calibration range, and it takes half a day.
A revalidation re-establishes the validation parameters themselves: precision, accuracy, linearity, LOD and LOQ, carryover, and short-term stability. It takes three to five days and it is the only defensible response when the change can move a parameter. The trigger for revalidation is not “the supplier changed.” The trigger is “the change can move precision, recovery, or carryover.”
My working rule: if the change touches the septa (material, durometer, thickness, or cure), revalidate. The septa is the part of the vial that is in contact with the headspace and the needle, and it is the part that produces ghost peaks, coring, and carryover. If the change touches only the glass body and the certificate shows the same inner-surface class and the same OD tolerance, verify. If the change touches the closure or the crimp torque, verify with an added leak test, because the failure mode there is a pressure leak, not a chromatographic one.
Where the septa source sits in the chain
The septa is often the part of the vial that changes without anyone noticing, because it is sourced separately from the glass. A supplier can change the septa converter and the glass plant stays the same. That is still a Class 3 event for your method, because the septa is what your needle pierces and what your headspace equilibrates against. The septa and the vial septa supply chain is where I have seen the most silent substitutions, and it is where the change-control entry most often has a hole. Ask the supplier to name the septa converter on the certificate. If they will not, treat the lot as a Class 3 event.
Writing the change-control entry so an inspector accepts it
An inspector is not looking for a long document. They are looking for four things in a specific order: what changed, what you decided it meant, what you did about it, and what the result was. If any of those four is missing or vague, the entry fails, and the failure is not about the science. It is about the record.
The entry I write has these sections, in this order:
- Change description. The specific part, the specific lot numbers, the specific supplier, and the specific attribute that changed. “New lot” is not a description. “Lot 22-K-0417, septa durometer 52 shore A versus 48 on prior lot 22-K-0391” is a description.
- Classification and rationale. The class (1 to 4) and the reason. The reason has to name the attribute that drove the class. If you classified as Class 2 because the septa durometer shifted, say so. If you classified as Class 1 because the certificate showed no shift, say which attributes you checked.
- Impact assessment. Which method parameters could move. Precision, recovery, carryover, LOD. Name them and say which ones the change can plausibly affect, and which it cannot.
- Action taken. The specific runs, the specific acceptance criteria, the specific number of injections. “Verification run” is not enough. “Ten injections of the mid-point standard, RSD limit 2.0%, plus one blank for ghost peaks” is enough.
- Result and disposition. The measured values, the pass or fail against the criteria, and the release decision. If the result was marginal, say so and say what you did about it.
- Approval. The name and role of the person who signed off. An entry without a named approver is an entry an inspector will question.
The failure mode I see most often is an entry that describes the change and the action but skips the classification rationale. The inspector then has to guess why you chose a verification instead of a revalidation, and a guess is a finding. Write the rationale as if the reader disagrees with you, because the one who will read it might.
Two field cases where the classification was the whole story
Case 1: the Class 1 that should have been Class 2
The symptom was the 2.8% RSD on the early-eluting internal standard. The change-control entry had classified the lot change as Class 1 because the certificate was within spec. The measurement that identified the problem was a septa durometer check on the new lot: 44 shore A against 52 on the prior lot. The soft septa was coring on needle penetration, and the fragments were producing a slow bleed that showed up as a drifting baseline on the early part of the run. The fix was to reclassify the change as Class 2, run the blank ghost-peak check, and add septa durometer to the release criteria so the next lot could not slip through as Class 1. The revalidation itself took a day and a half. The classification error took three weeks to find.
Case 2: the Class 3 that was really a Class 1
The opposite failure. A new supplier was brought in for a cost reason, and the lab classified it as Class 3 and ran a full revalidation. The revalidation passed, but it cost five days and delayed a release. The measurement that showed the classification was over-cautious was a side-by-side comparison of the two suppliers’ certificates: same glass plant, same septa converter, same inner-surface class, same OD tolerance, same crimp torque. The new supplier was a distributor, not a manufacturer. The correct classification was Class 1 with a verification run. The lesson is not that Class 3 is wrong. The lesson is that the classification has to be driven by the manufacturing chain, not by the name on the purchase order. A distributor change is not a supplier change. A manufacturing-site change is.
A decision checklist for the change-control meeting
This is the checklist I put in front of the change-control meeting. It takes ten minutes and it prevents both failure modes above.
- Is the change a new manufacturing site, a new septa converter, or a new glass plant? If yes, Class 3. Stop.
- Is the change a new distributor only, with the same manufacturing chain? If yes, Class 1 with a verification run.
- Does the certificate show a shift in septa durometer (> 3 shore A), septa thickness (> 0.1 mm), body OD (> 0.1 mm), or crimp torque (> 2 inch-ounces)? If yes, Class 2.
- Does the certificate show a shift in inner-surface chemistry class? If yes, Class 3.
- Is the method sensitive to adsorption of polar analytes (phenols, amines, low-level semivolatiles)? If yes, treat any septa or glass change as Class 3 regardless of the certificate.
- Is the method a headspace method with a pressure leak test? If yes, add a leak test to the verification for any closure or crimp change.
- Is the supplier unable to provide the six release attributes? If yes, Class 3 until they can.
If the checklist produces a class, the change-control entry writes itself, because the class determines the action and the action determines the acceptance criteria. The only judgment left is whether the acceptance criteria are tight enough, and that is a method-specific question you should have answered when you validated the method the first time.
The acceptance criteria that actually catch a bad lot
System suitability alone is not enough. It catches gross failures and misses the slow drift that costs you a release three weeks later. I add three criteria to the verification run for any vial change:
- Ghost-peak check. One blank injection at the method’s sensitivity. No peak greater than 0.5% of the analyte area at the mid-point standard. This is the criterion that catches septa bleed and residual extractables.
- Carryover check. One high-standard injection followed by a blank. Carryover less than 1.0% of the high-standard area. This is the criterion that catches coring and needle contamination.
- Recovery comparison. One spiked sample at the low end of the calibration range, compared to the prior lot. Recovery within 90 to 110% of the prior lot. This is the criterion that catches adsorption on the glass.
Those three criteria, plus system suitability, will catch most of the failure modes a vial change can introduce. They take one shift to run. The alternative is to find the problem in a failed release three weeks later, which costs more than the shift.
What the record has to say about the old lot
One detail that inspectors ask about and labs forget: the change-control entry has to state what happened to the old lot. If the old lot was consumed, say so, with the date. If it was quarantined, say so, with the disposition. If it was returned to the supplier, say so, with the return authorization number. The reason this matters is that the entry is the only place the inspector can confirm you did not mix the two lots in the same run, which would invalidate the comparison.
The same logic applies to the HPLC vial side of the lab if the same change affects both. A supplier change that touches the glass plant touches both the VOA vial and the HPLC vial, and the change-control entry should say whether the HPLC method was assessed. If it was not, say why. An inspector who finds an unassessed sibling method will ask about it.
Where the external standards fit, and where they do not
The revalidation triggers themselves are not written in a single standard. U.S. EPA SW-846 tells you what a VOA container has to be, but it does not tell you what to do when the supplier changes. USP general chapters give you the validation parameters, but they do not give you the change matrix. The change matrix is yours to write, and it has to live in your quality system, not in a supplier’s brochure.
What the standards do give you is the acceptance criteria you should be comparing against. The instrument vendor’s application notes (Agilent’s GC columns and accessories documentation, Thermo Fisher’s chromatography and sample handling guides, and Restek’s technical resources) give you the typical carryover and ghost-peak numbers for a given inlet and liner, which is the baseline your vial change has to stay within. If your carryover after the change is 1.2% and the vendor’s baseline for the same inlet is 0.3%, the vial is the problem, not the inlet.
Takeaway: classify by the manufacturing chain, not the purchase order
The decision rule is this. Classify the change by what actually changed in the manufacturing chain, not by what changed on the purchase order. A new manufacturing site, a new septa converter, or a new glass plant is a Class 3 event and gets a full revalidation of the vial-dependent portion of the method. A certificate shift in septa durometer, septa thickness, body OD, or crimp torque is a Class 2 event and gets a verification run plus a ghost-peak and carryover check. A distributor change with the same manufacturing chain is a Class 1 event and gets a verification run. Write the entry with the classification rationale named against the specific attribute that drove it, the acceptance criteria stated as numbers, and the old-lot disposition recorded. If you cannot name the attribute that drove the class, you have not classified the change. You have guessed at it, and the next failed system suitability run will tell you which.
References & further reading
Related resources from our lab consumables network:
External references and standards: